Home
- Gallery
- Contact
- My Origami
- Videos -
Privacy Policy
BONSAI ORIGAMI IRIS FLOWER
This is how to make an artistic Bonsai Origami Iris
flower arrangement including
instructions for making the leaves and stems.
The folding pattern for the Iris flowers is a little different than
the one for the
traditional Origami Iris.

Step 1:
I
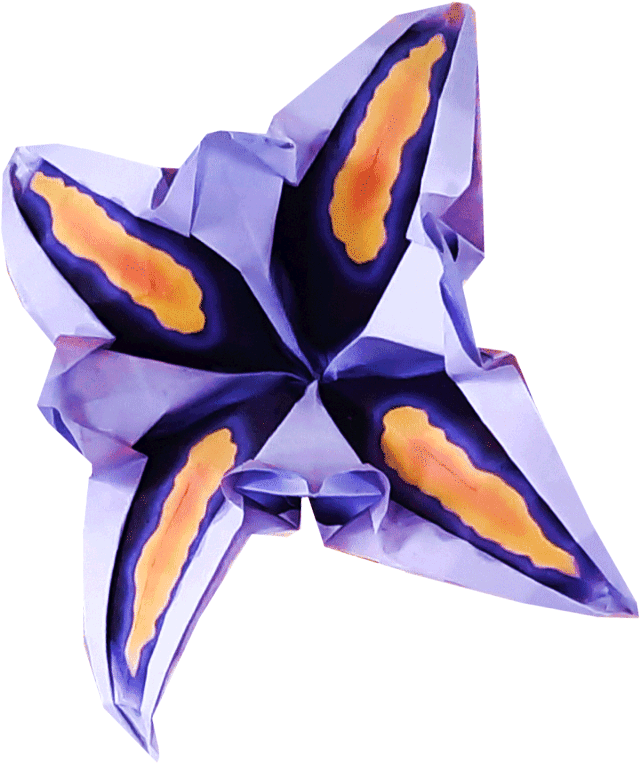
used this paper for the flowers, it goes with one of my flower books
(Beautiful Paper Flowers)
Paper folded Iris Flowers


Step 6:
Valley-fold
over these 2 lines
Step 5:
Squash-fold
the flap
Step 2:
Prefold
over these 4 lines.
Step 4:
Valley-fold
this flap upwards

Step 3:
First
valley-fold over the 2 lines at the bottom-right. Then mountain-fold
over the 2 diagonal lines in the middle. And valley-fold over the 2
lines at the top-left.

Step 10:
Valley-fold
the triangular flap upwards


Step 8:
Pull
the edge indicated by the arrow downwards by making a valley-fold
over the yellow line
Step 9:
Press
the edges flat/downwards, see pink arrows
Step 7:
Unfold
the folds of step 6

Step 16:
Make
an inside reverse fold over these two sets of 3 lines
Step 15:
Pull
this petal downwards
Step 12:
Bookfold
the layer indicated by the arrow to the left
Step 11:
Repeat
steps 5 to 10 on the other 3 flaps, see pink arrows.
Step 14:
Repeat
step 13 on the other 3 flaps


Step 13:
Pull
the flap downwards by making an inside reverse fold over these 3
lines


Step 21:
Curl
the tip of the tiny flap, by rolling it up with your fingers, see
arrow
Step 19:
Push
the layers between the 2 arrows against each other
Step 20:
Hold
the model the same as I do here.Then squash-fold the tiny flap with
your other hand, see arrow, against the fingers which are holding
the model
Step 18:
Now
the other side of the paper is revealed. Repeat steps 15 to 17 on
the other 3 petals
Step 17:
Curl
the tip (slowly) downwards


Step 22:
Repeat
steps 19 to 21 on the other 3 tiny flaps
Step 28:
Valley-fold
over this line
Step 25:
Make
about 4 of these flowers for one arrangement
Step 26:
Glue
2 paperstrips together to make the stems. Some of the stems are made
of 3 paperstrips glued together.

Step 24:
Now
the bottom of the flower looks like this, the tip of it is glued
inside the tip of the stem later.
Step 23:
Push/press
the 4 edges on the bottom of the flower inwards, only 2 edges are
visible in this picture, see pink arrows


Step 29:
Insert
metal/florist wire in the stem
Step 27:
Mountain-fold
over this line, then turn the paper.

Step 30:
Valley-fold
in half over this line
Step 31:
And
one stem is done....
Step 32:
This
paper is for the leaves, it has the same size as the paper for the
flowers

Step 33:
Cut
out 4 squares of one paper. Then valley-fold over these 2 lines
Step 35:
Make
two more of these leaves

Step 34:
Crumple
the model in your hands a little, then turn the model


Step 36:
Glue
the 3 leaves together to make one big leaf.
Step 37:
This
leaf is glued to the tip of each stem


Step 38:
On
the other places leaves made of two segments are glued to the stems,
see next picture
Step 39:
Bend
the stem downwards on the left, see arrow on the left. And bend the
stem upwards on the right, see arrow on the right
Step 40:
Make
about 6 of these stems with leaves, vary a little in length and
number of leaves. See the final picture as guidance


Each flower is glued to a
single stem, then the bottom part of the 4 stems are glued together.
This is a detailed video tutorial for making Bonsai Origami Iris
flower arrangement:


