Home
- Gallery
- Contact
- My Origami
- Videos -
Privacy Policy
Origami Clothes hanger
This is a tutorial for making a real useful paper Origami clothes
hanger


Step 1:
This
long paper is made of five standard printer / copy papers taped
together into one paper of 20x150 centimetres.
Fold in half over the black line.
Origami clothes hangers in a fashion
shop


Step 6:
Fold
into an angle of 45 degrees again, all four parts get the same
length.
Use tape or glue to keep the model in the right shape
Step 5:
Fold
into an angle of 45 degrees.
Step 2:
Fold
in half two more times, then prefold in half one time
Step 4:
Fold
into an angle of 45 degrees, both parts get the same length, see
purple lines

Step 3:
Fold
the part on the right into an angle of 45 degrees (Make the same
folds on the backside)

Step 10:
Fold
over these two lines, the picture below shows how it's done in the
video tutorial


Step 8:
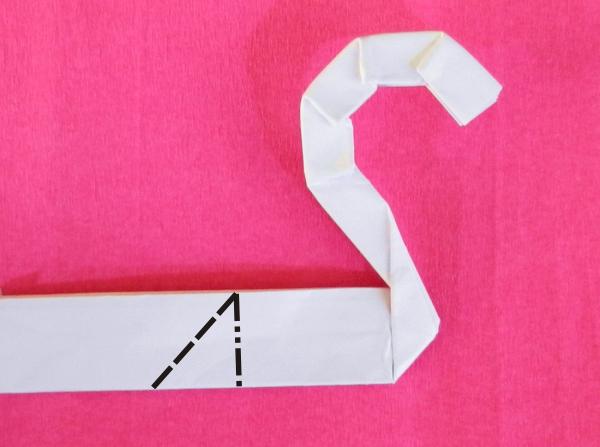
Squash-fold.
Step 9:
Fold
the hanger downwards.
Step 7:
Make
an outside reverse fold (make the same fold as the line on the left
at the layer on the backside). Use the center of the model as
guidance, see arrow and dot.


Step 16:
Fold
over these two lines, use the edge indicated by the arrow as
guidance.
The picture below shows how it's done in the video tutorial
Step 15:
Fold
the strip straight upwards.
Step 12:
Make
an outside reverse fold (make the same fold as the line on the right
at the layer on the backside)
Step 11:
Fold
over these two lines.
Step 14:
Fold
the strip straight downwards, use the edge indicated by the arrow as
guidance.


Step 13:
Make
an inside reverse fold (make the same fold as the line on the left
at the layer on the backside).
Use the center of the model as guidance, see arrow


Step 17:
Fold
the remaining part of the strip around the hanger


Done!
This is a video tutorial by Joost Langeveld for making the clothes
hanger:
Picture above: Origami
fashion shop
Left picture: Origami
flower hair piece, Origami studded bangles and a fashion doll in
newspaper dress


