Home - Gallery - Contact - My
Origami
- Videos -
Privacy Policy
ORIGAMI
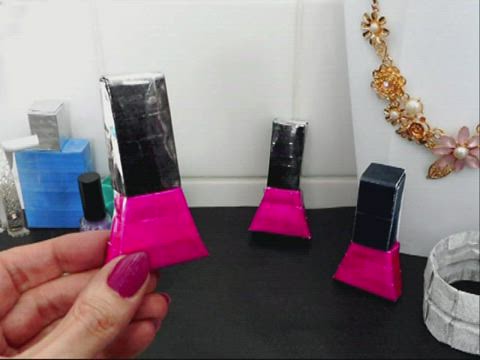
NAIL POLISH BOTTLE
This is a step-by-step tutorial for making a mini bottle / nail polish
bottle
out of just two paper rectangles.
I used a black and purple / reddish papers for my own bottles.

Step 1:
Fold
and cut a large paper square in half or glue two smaller squares
together. Both papers are the same size.
Prefold the purple paper in half and fold both edges to this
prefolded centerline.


Step 6:
Fold
over these lines, use the prefolded squares pattern as guidance.
Step 5:
Fold
over these two prefolded lines.
Step 2:
Fold
to the centerline again and unfold the model.
Step 4:
Fold
both edges to the centerline two more times and unfold the model
afterwards.

Step 3:
Prefold
in half and fold both edges to this prefolded centerline.

Step 10:
And
the bottle is done....


Step 8:
Fold
into a straight angle (90 degrees).
Step 9:
Fold
into a straight angle and glue the edges together.
Step 7:
Fold
the left and right part into a straight line with the centerpart.

Step 16:
Repeat
step 15 three more times and glue the edges together.
Step 15:
Fold
the square on the right on top of the square on the left, see arrow.
Step 12:
Prefold
in half and fold both edges to this prefolded centerline.
Step 11:
Prefold
in half and prefold both edges to this prefolded centerline.
Step 14:
Fold
over these two prefolded lines.


Step 13:
Fold
to the centerline and unfold the model.


DONE!
This is a how-to video for making the nail polish
bottle:


